

TabellenFaktura for Excel · Manual
Create and send the first invoice
After setup, a completed Excel folder, the wizard check and the final control of the generated file are sufficient.
1. Write the bill in Excel
- Create a copy of the finished template and save it under a unique name.
- Enter the buyer with address and e-mail or via Customer → Insert customer The
- Add the date of invoice, date of performance or period and maturity.
- Total benefits with quantity, unit and net unit price.
- Recalculate formulas, control sums and print views and save the mappe.
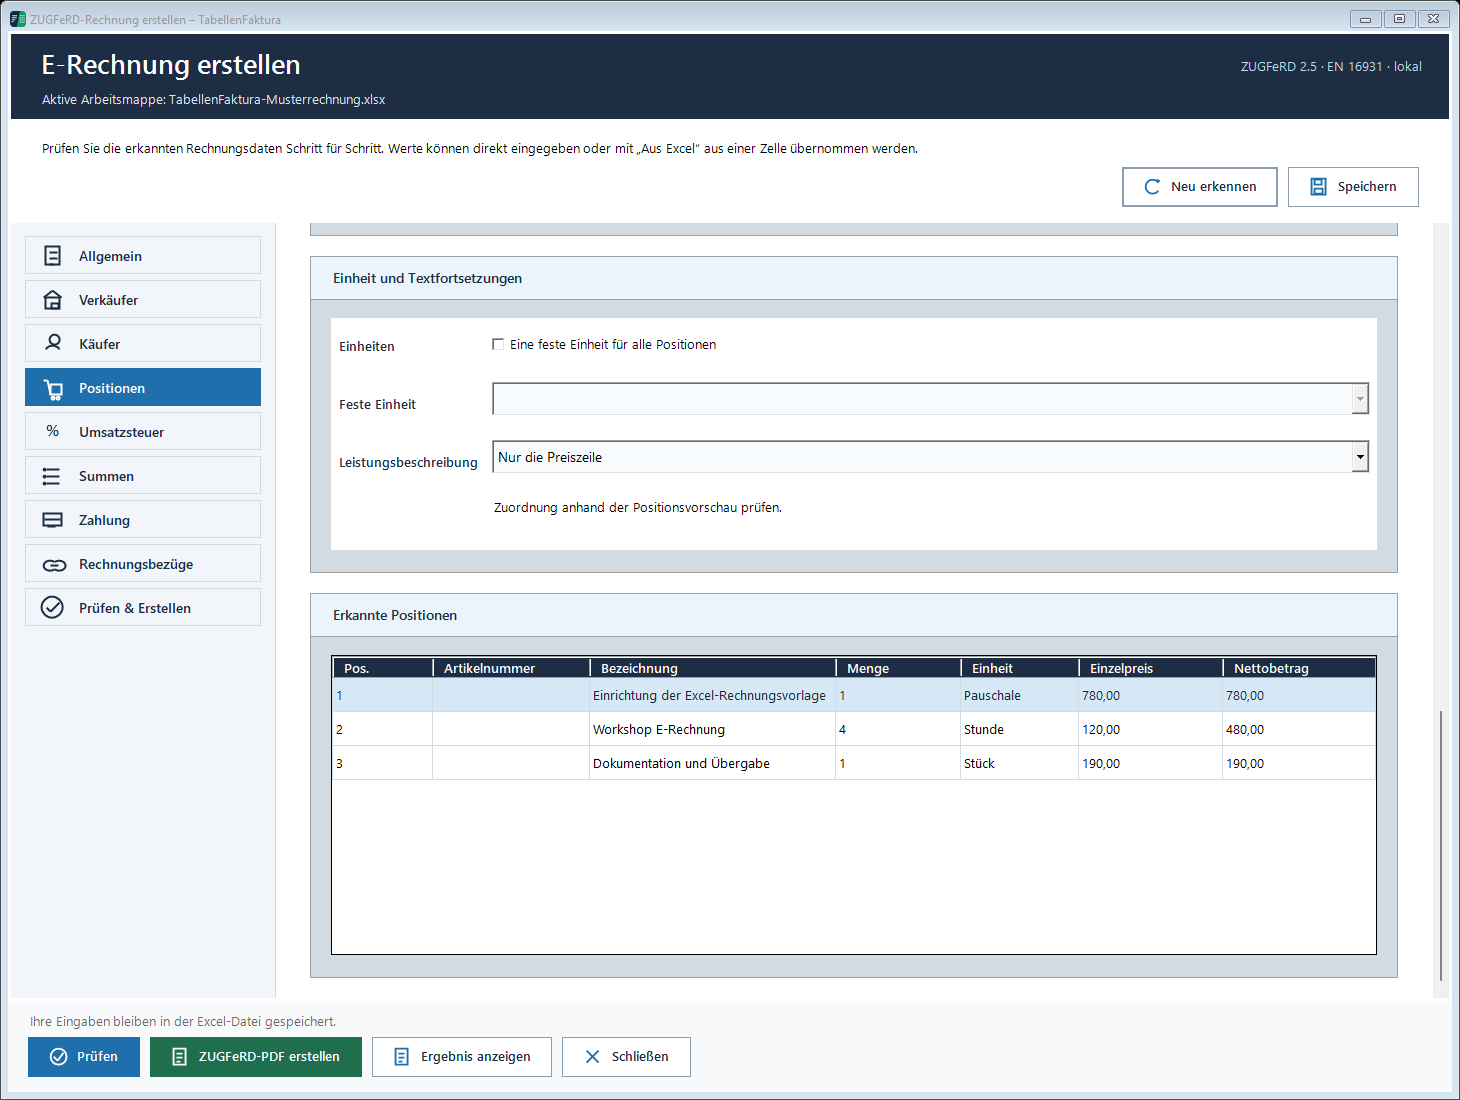
Example: A setup to 780,00 €, four workshop hours to 120,00 € and a documentation to 190,00 € result 1.450,00 € net. If the patient is 19 % VAT the 275,50 € Control and 1.725,50 € bru toto. This is a calculation example; recipients, data and tax treatment of the actual invoice must fit.
2. Use a unique invoice number
If the Number circle is established; e-invoice → Accounting management → New number The number is reserved and written in the allocated invoice number cell. Only then will the final invoice be created.
A unique number can be used for an existing number system. Do not take an old number from the copied mappe. The final creation checks the number against the local journal.
3. Open and check ZUGFeRD invoice
- Activate the correct billing sheet and Create ZUGFeRD invoice The
- The General Check the billing, number and data.
- Salesman and Buyer check.
- The Line items compare the complete list with the Excel invoice, taking into account the last position and any subsequent pages.
- VAT, Totals, Payment and where appropriate: Invoices The
- Check click on error messages, correct causes and check again.
Preferably correct values in the Excel folder to match print image and structured data. After changes in the wizard, compare both views again.
4. Create the final file
- Create ZUGFeRD PDF The
- Check and save the proposed file name and location.
- Completely await the preparation and the technical audit.
- Compare PDF and embedded invoice data in the results view: Recipient, number, date, all items, tax and payment amount.
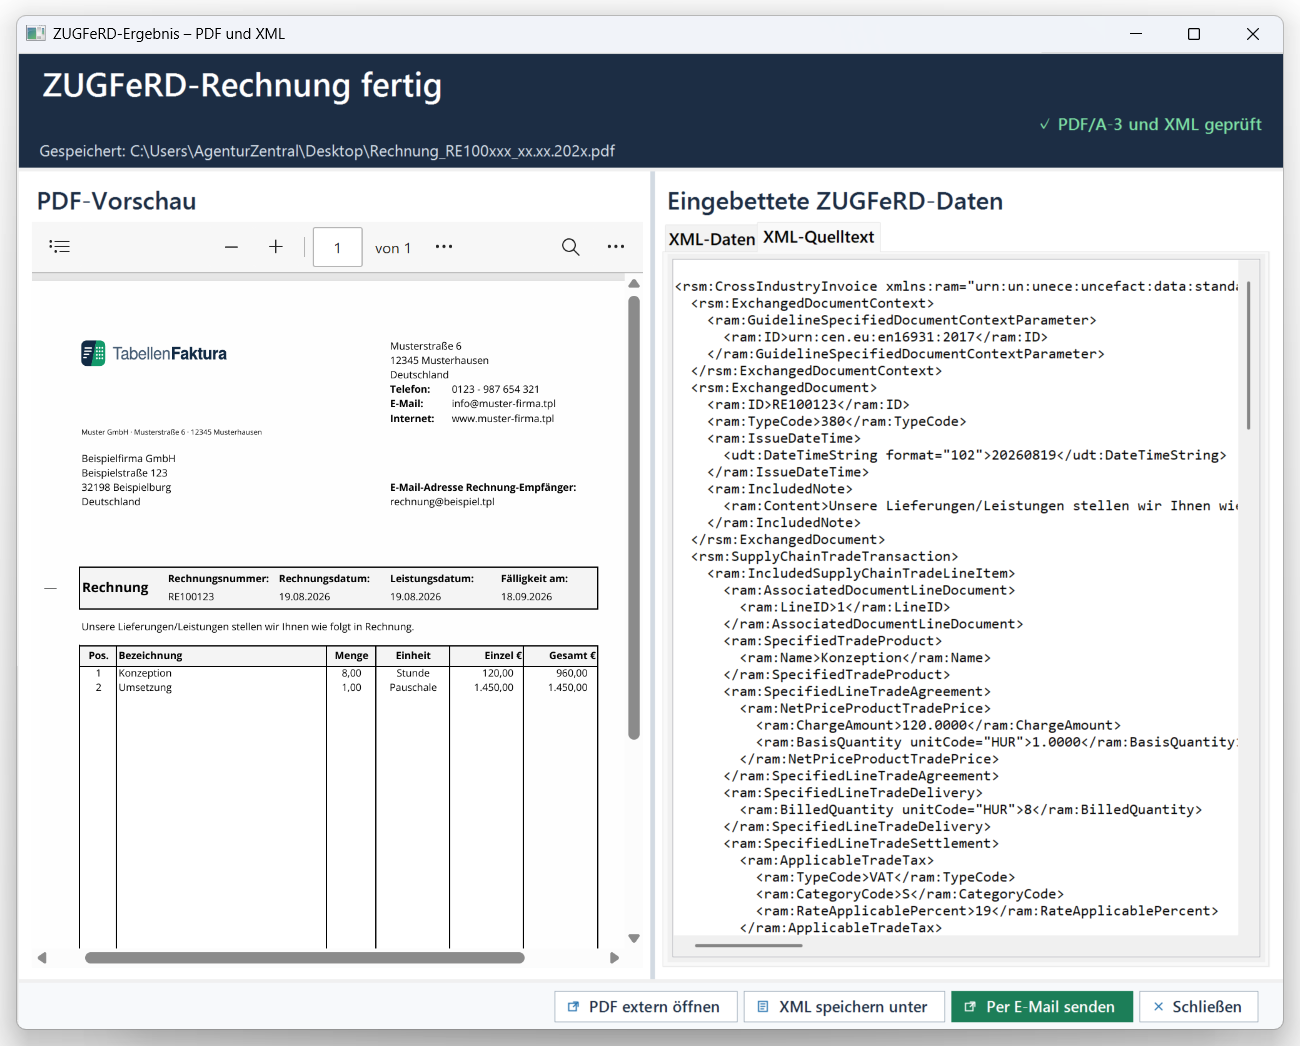
Existing output and archive files are not overwritten. In case of a collision use a new file name; in case of already finalized invoice number use the existing document or a technically appropriate correction process. The final invoice is also stored in the archive and recorded in the journal. A successfully generated file has not yet been sent to the customer. Technical validation does not replace the verification of the actual business process.
The finished ZUGFeRD PDF is not again "print as PDF, edit afterwards or replace it with an ordinary PDF export. In doing so, embedded invoice data can be lost or no longer fit the visible document.
5. Control and send to Outlook
- In the Result View Send by e-mail The
- Check the recipient, sender account, subject and message. The stored email template is filled with the invoice data.
- Open the Outlook draft.
- Check the recipient, sender, signature and actual PDF attachment in Outlook again.
- Only then in Outlook Send The
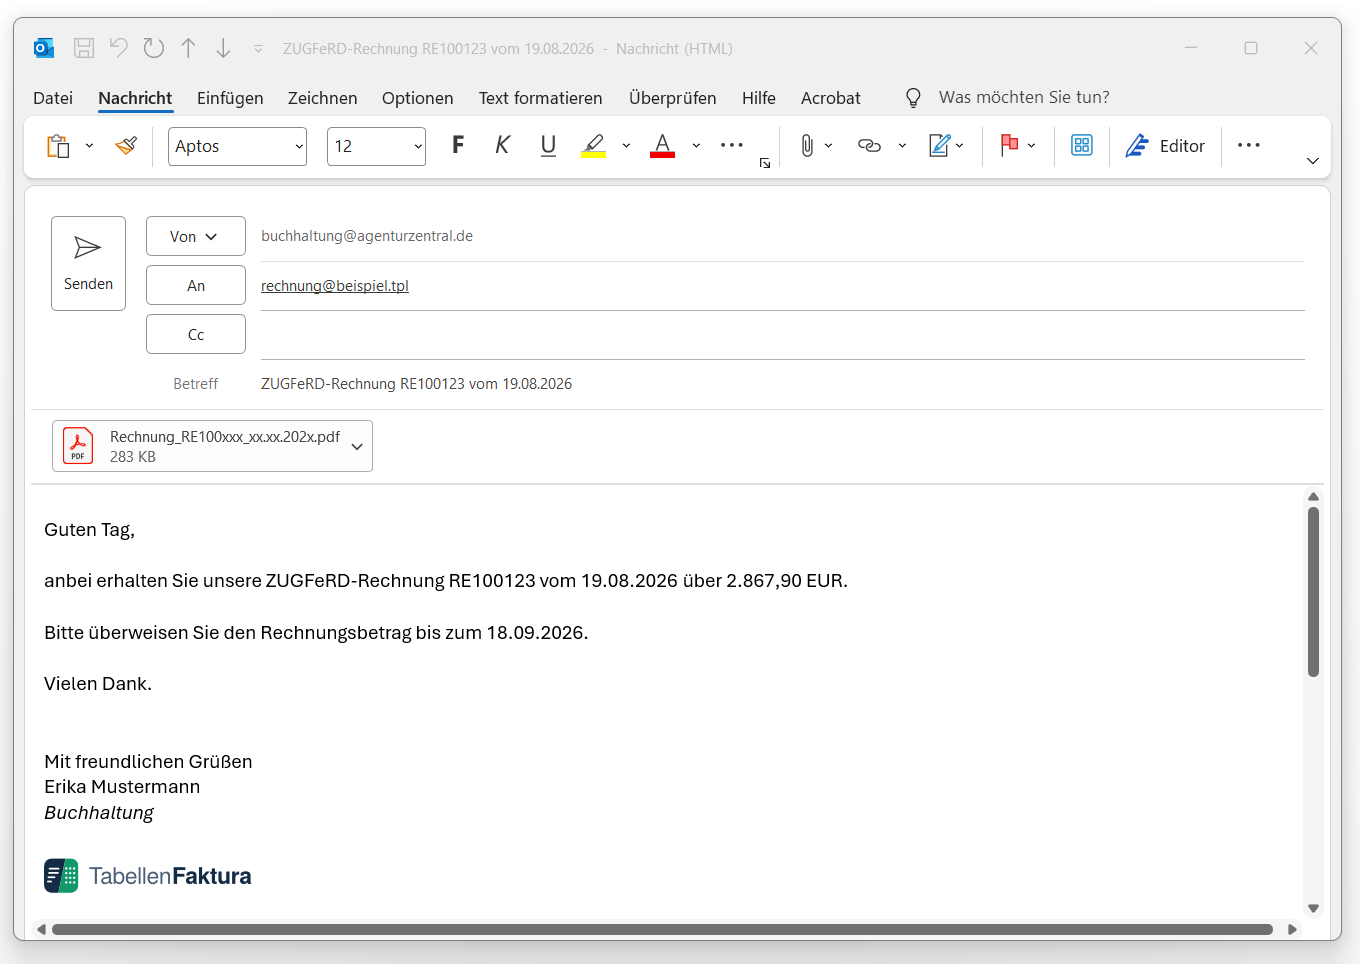
For other mail programs, attach the finished file manually. In XRechnung, the generated XML is transmitted via the channel specified by the recipient, if necessary a billing portal instead of e-mail. TabellenFaktura does not confirm delivery or payment; control the dispatch in the used mail program or portal.
6. After the first invoice
In Journal control the final entry and a Data backup Start with a copy of the created template for the next invoice. Do not overwrite an invoice that has already been created with the same number.