

TabellenFaktura for Word · Manual
Set up a Word invoice template
Connect text ranges and table cells to the structured invoice fields while keeping the layout in Word.
1. Prepare an editable document
Open a copy of the existing invoice as an editable DOCX file. Alternatively, begin with the basic template offered under E-Rechnung → Eigene Word-Vorlage → Word-Vorlage vorbereiten. Replace all sample data before issuing a real invoice.
Lay out the letterhead, addresses, invoice fields and line-item table in Word. Check all pages in Print Preview. Information embedded in an image is not automatically an invoice field; provide important values as real text.
2. Work through setup
Hilfe → Einrichtung covers the template, fields, line range, numbering, archive, customers, email and backup. The offered storage scope determines whether a setting belongs to the document, a selected profile or a shared default.
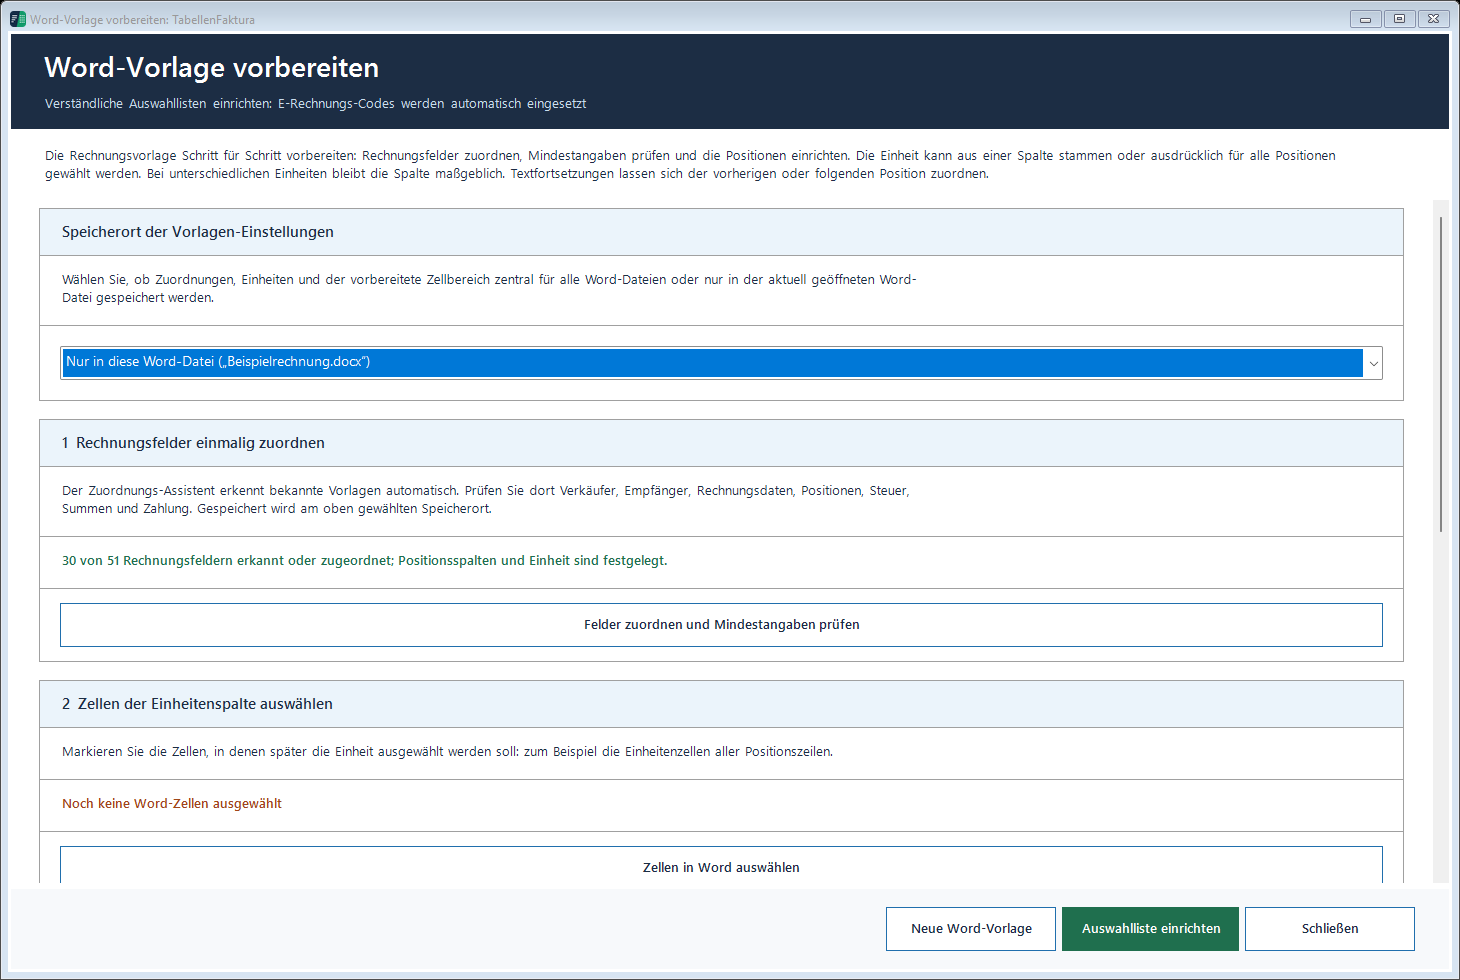
Use document-bound mappings for different layouts. Shared defaults suit genuinely matching templates. Save both the mapping and the Word file. A complete file copy preserves document mappings more reliably than copying only visible text.
3. Map a value with Aus Word wählen
- Open the corresponding assistant section and field.
- Select Aus Word wählen.
- In Word, select only the actual value, such as the invoice number without its label or surrounding paragraphs.
- For a table cell containing one value, clicking inside the cell can suffice. Select the exact text if it contains several values.
- Select Auswahl übernehmen in the small selection window.
- Check the imported value in the assistant.
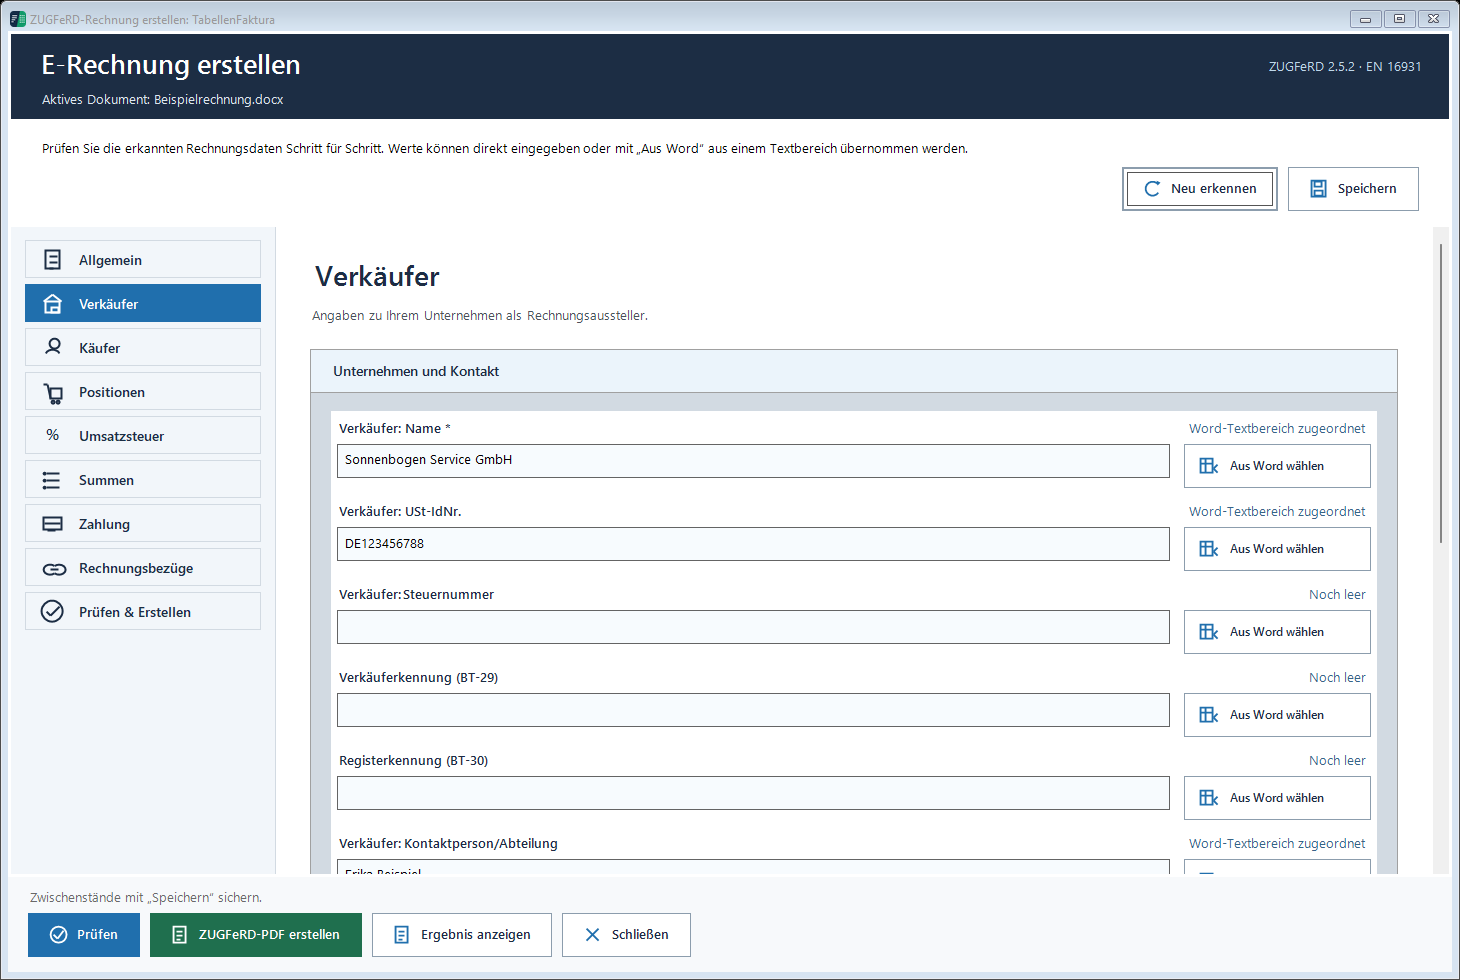
The same approach can connect header text and suitable table cells. Mappings use Word content controls or bookmarks. Preserve these and edit their content where possible. If a mapped range is deleted or replaced entirely, select and map it again.
Direct entry is available for deliberately fixed values. It does not automatically change visible Word text. Seller, buyer, dates and amounts must agree in both representations.
4. Connect the line-item table
- Select the table containing invoice lines, not an address or bank-details table.
- Set the first and last item row or map the actual range under Bereich / Name.
- Map description, quantity, unit and net unit price.
- Add item tax rate, tax category, product identifier and visible net line total where applicable.
- Compare every recognised line with the Word invoice.
Word columns are numbered 1, 2, 3 and so on from the left. Do not enter Excel column letters. Spalte aus Word wählen helps capture a column. Headings, carried totals and summary rows are not additional services.
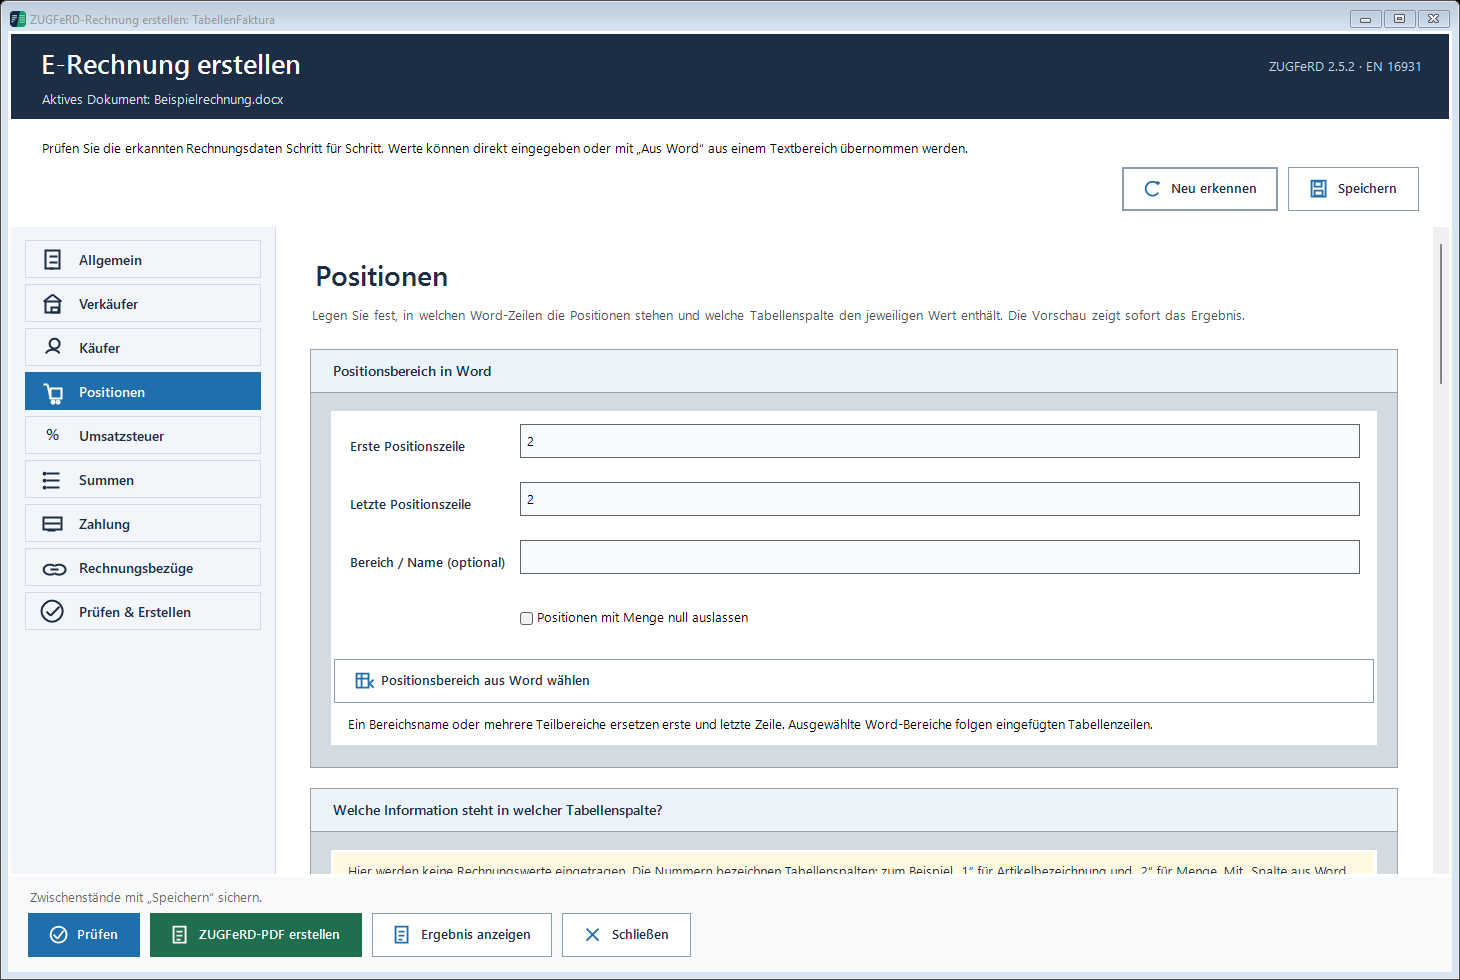
Item rows need a consistent column structure. Remove merged cells within the data region before mapping. Map separate blocks explicitly and check the first and last real item.
5. Descriptions, continuation text and units
Additional description columns can contribute to the complete service description. Choose the separator, such as a space or line break. Check long descriptions in the recognised data.
For separate text-only rows, explicitly choose whether the text belongs to the preceding or following item. Do not attach unrelated headings. A line break within the description cell is often suitable for a simple multiline description.
Units can come from a mapped column or be explicitly fixed for every line. Use the column for mixed units. In template preparation, select only the unit input cells, choose the units and apply the dropdown list. A custom label requires the correct standard unit code.
6. Secure references and save
Bezüge absichern anchors item ranges and columns to Word content so inserted rows and columns can be tracked more reliably. Always recheck after layout changes. Deleted bookmarks or content controls are not automatically recreated.
Run Mindestangaben prüfen, fill missing mappings and select Zuordnungen speichern. Save the Word document as well. Templates can contain placeholders during setup, but final invoices require complete real data.
7. Configure email
- Set up and open classic Outlook with the intended account.
- Open E-Rechnung → E-Mail → E-Mail-Einstellungen.
- Select storage scope, sending account and message format. Reload accounts if needed.
- Select an Outlook signature or explicitly choose none.
- Edit the subject and message, preserve the placeholders and check the preview.
- Save the settings.
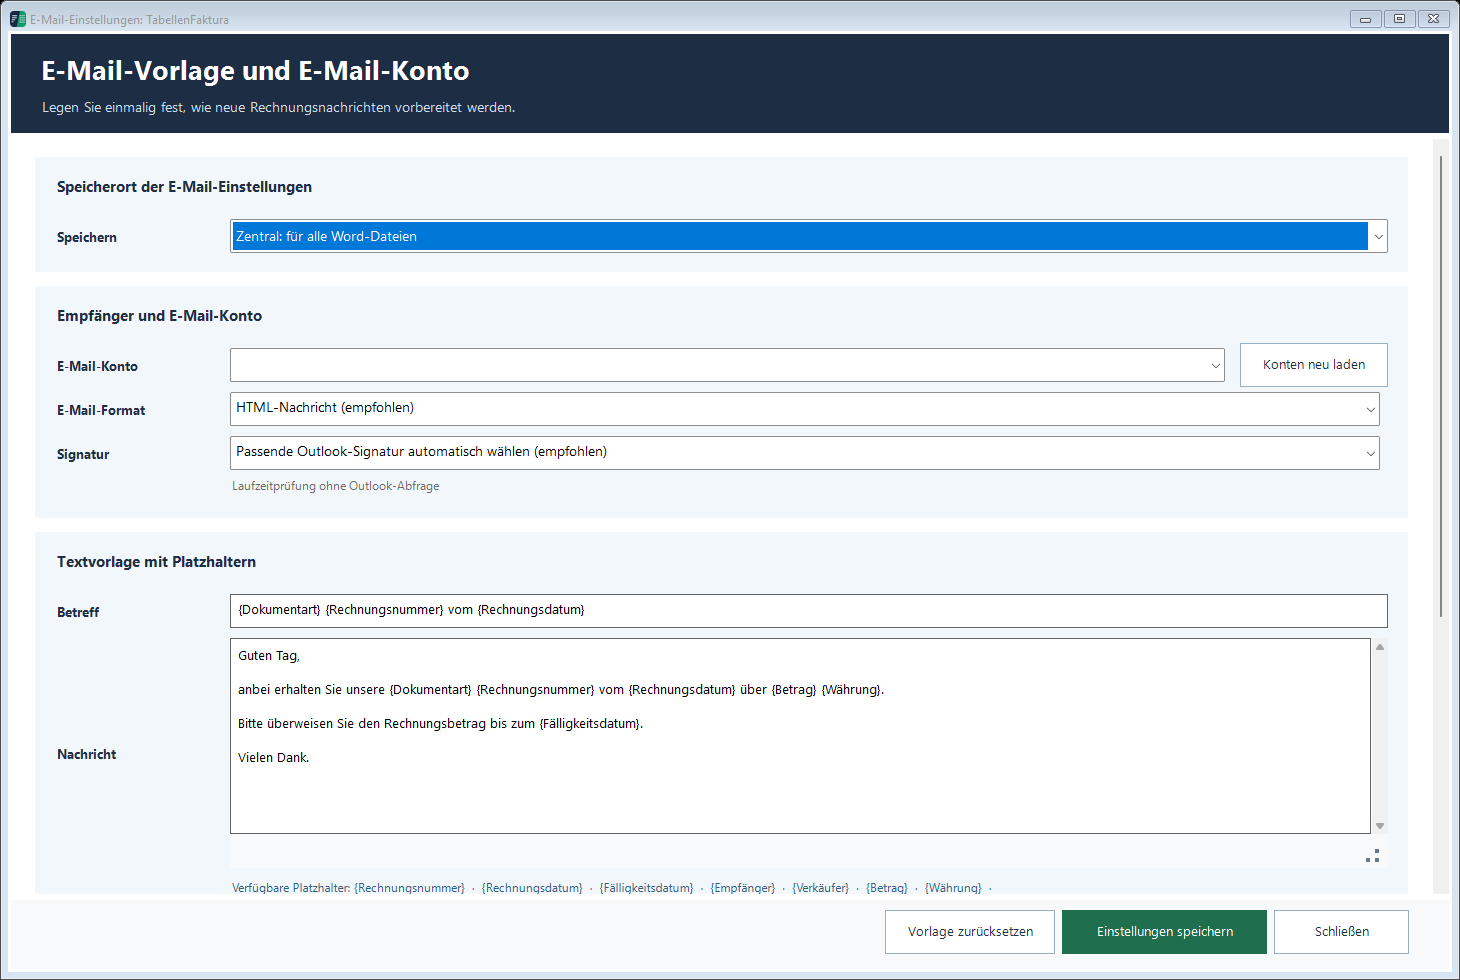
Typical placeholders include {Rechnungsnummer}, {Rechnungsdatum}, {Empfänger}, {Betrag} and {Dateiname}. Use the exact supported names displayed in the application. The seller's invoice email does not replace selection of the Outlook sending account.